同時駕馭 10+ 個 CLI 程式設計 agent 的設定方式
tmux、Tailscale、iOS 上的 Termius,加上一個小型 PWA 控制台 — 在桌面或火車上同時駕馭 10+ 個並行程式設計 agent 的方法。
本文為 LLM 自動翻譯,原文以 English 版本為準;如有不通順或誤譯處,建議參照原文。
在一般的工作日,我會同時跑 10+ 個 CLI 程式設計 agent — Claude Code、Codex、Gemini CLI 混在一起用。 有的在開發功能,有的在跑資料攝取或訓練任務,有的在拉取個別結果好讓我逐一檢查,還有幾個在做雜事 — commit、PR、code review、文件撰寫。幾個朋友問我怎麼讓這一切不會崩成一團混亂,所以這篇就把整套設定寫下來。
技術組合
沒什麼花俏的:自家主機上跑 tmux + vim,Mac 用 iTerm 或 Ghostty,
Tailscale 處理遠端連線,
手機用 Termius,再加上一個我自己寫的小型 PWA 當作控制台。有趣的不是任何單一工具 —
而是它們組合起來讓我在不同 agent 之間切換的成本有多低。
一個專案一個 tmux session
每個專案開一個 session(tmux new -s <project>),底下再依用途切成幾個 window:
一個跑 agent、一個 tail 測試或 logs、一個監控長時間的 pipeline、一個處理 git 操作。
長時程的任務指派下去就讓它跑著;我切走、指派下一個 agent,等到有狀況再輪回來看。
我實際在用的 tmux 操作其實很少:
tmux a                # attach 到 session
tmux new -s <name>    # 開新 session
<C-b> z               # 把當前 pane 放到全螢幕
<C-b> s               # 挑 session
<C-b> q               # 顯示 pane 編號 → 直接跳
<C-b> <n>             # 跳到 window n
就這樣。沒有外掛、沒有自訂設定 — 六個動作練成肌肉記憶就夠用。
用熟之後想再深入,我長期擺在書籤裡的兩份備忘錄是
MohamedAlaa 的 tmux cheatsheet gist
(單頁,一眼掃完)以及
tmuxcheatsheet.com
(可搜尋、依操作分類)。兩份對照,幾乎所有 binding 都查得到,根本不需要打開 man tmux。
Tailscale:自家主機、零對外曝險
我把這套東西在自己的「地端」(home box)跑,除了把 GPU 和磁碟塞滿之外,安全考量才是真正的原因。 我跑的東西有一半根本沒驗證機制,我可不想把它們暴露在公網上。 Tailscale 把筆電、手機、那台主機放在同一個私有 mesh 上, 不論在哪登入都連得上 SSH 與任何 prototype web server — 從來不需要走公網。
手機上的 Termius
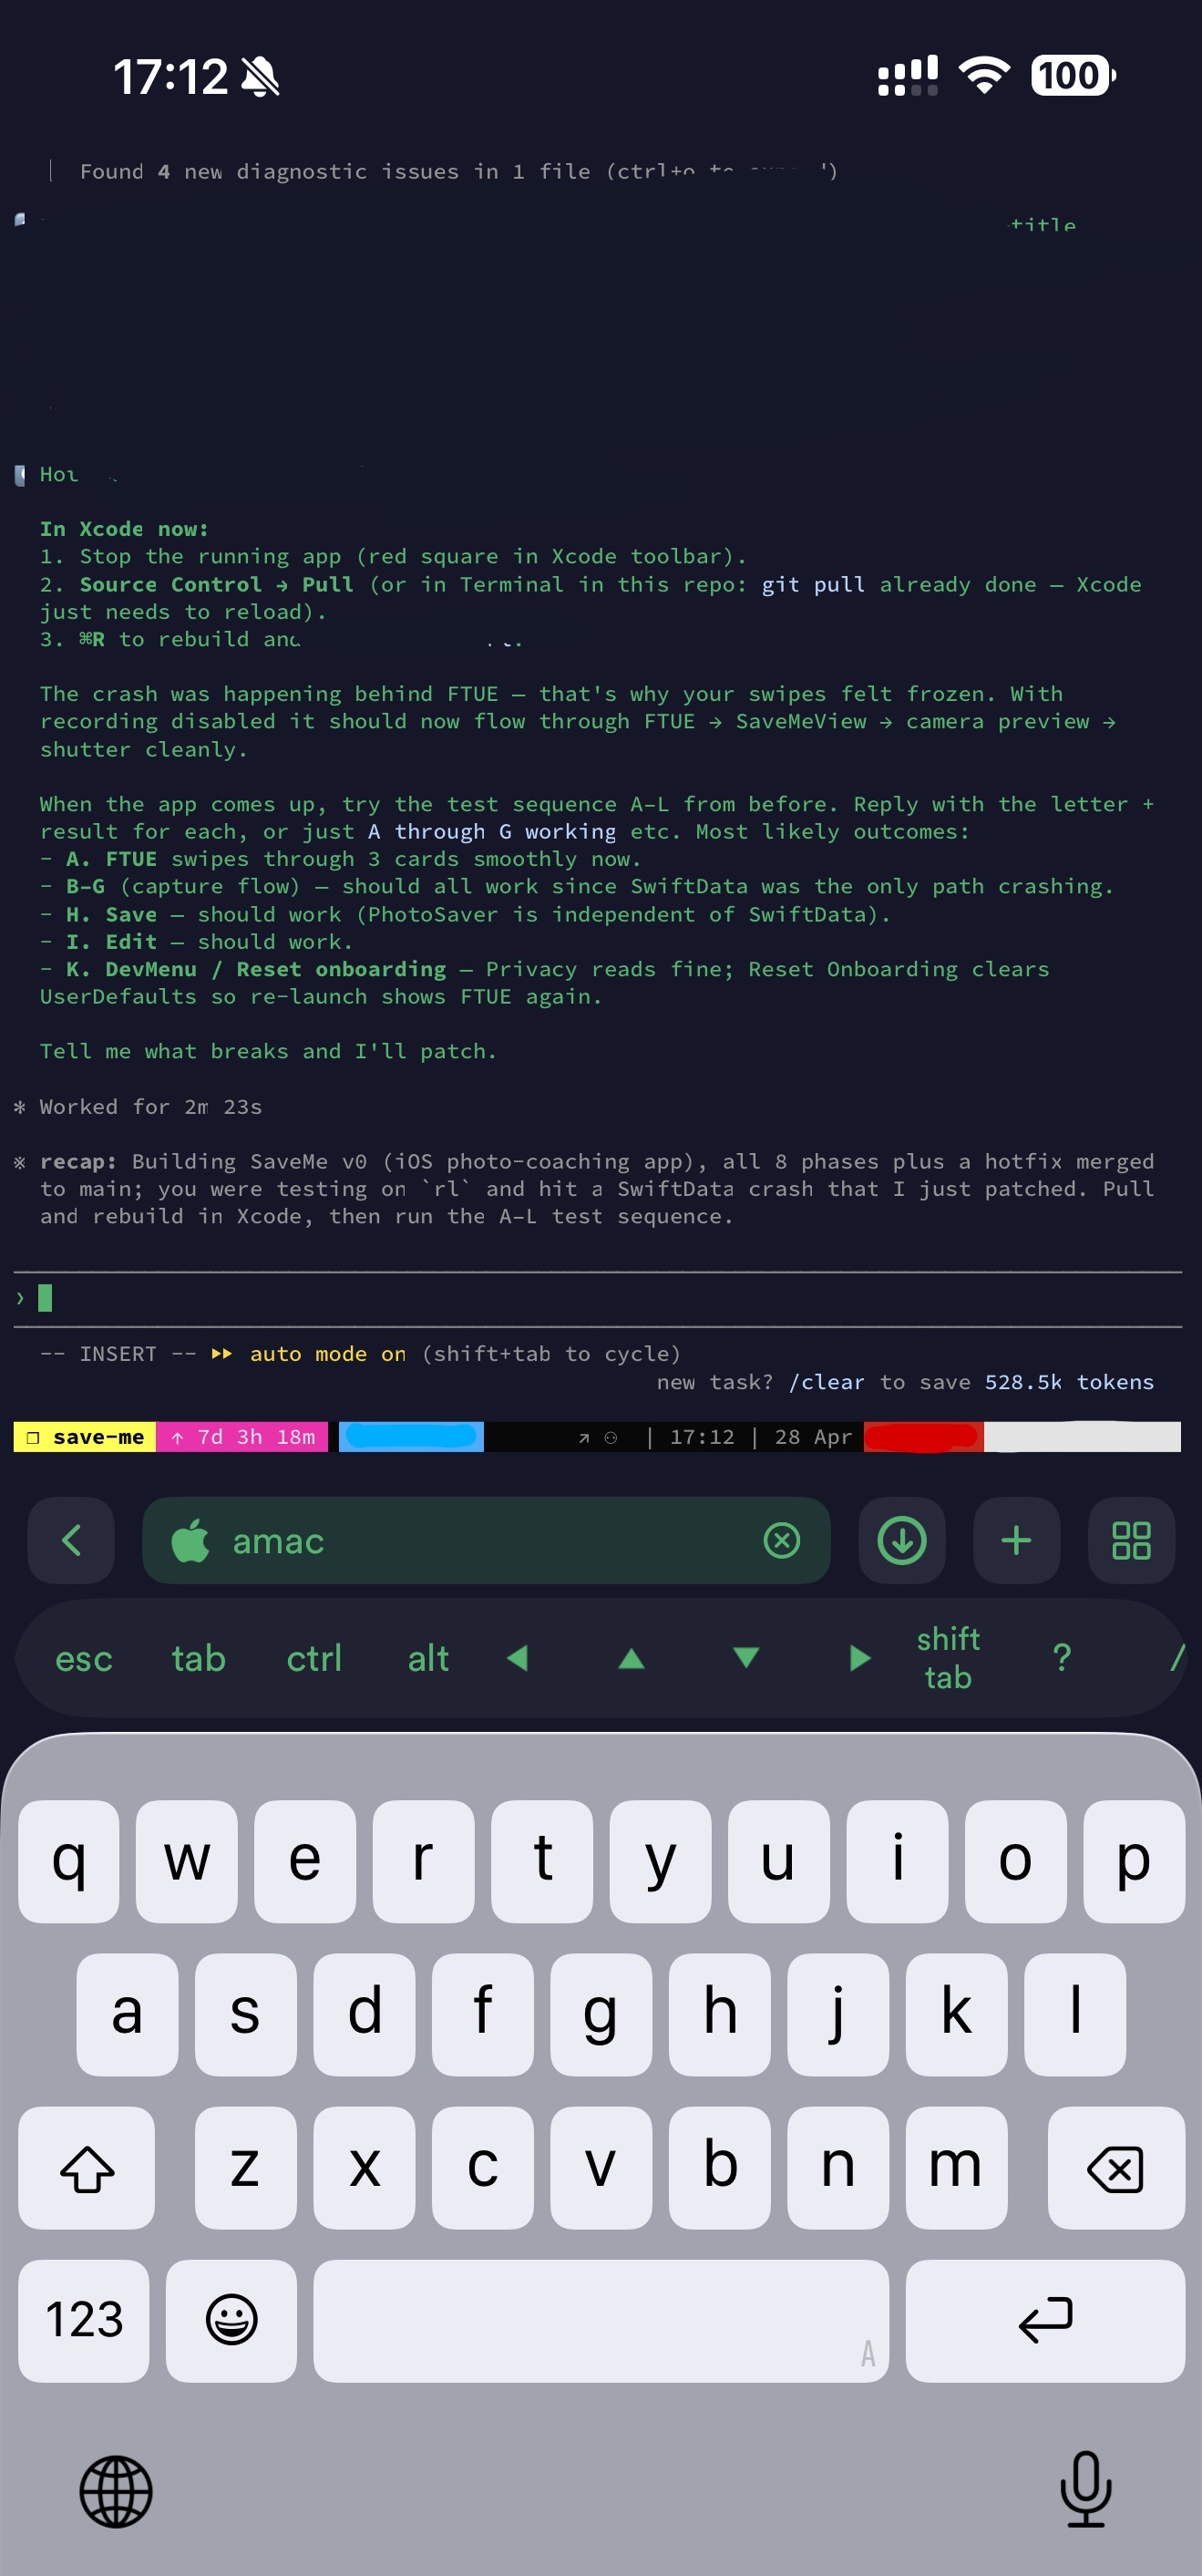
在外面的時候,我用 iOS 上的 Termius SSH 進去。Termius 真正讓 tmux 在手機上能用的關鍵 是它的 shortcut bar — esc、tab、ctrl、alt、方向鍵、shift+tab — 直接擺在鍵盤上方。 搭配 tmux prefix,我在火車上一隻手就能驅動一個 Claude Code session。
真的需要 GUI 的時候
大部分工作都在 terminal 裡,但偶爾還是會需要看到畫面 — 某個 agent 起的 dashboard、Jupyter UI, 或某個無法 headless 跑的工具。這種情況我會在自家主機上裝 Chrome Remote Desktop 與 VNC server。 CRD 比較簡單、瀏覽器就能用;VNC 也行,記得綁在 Tailscale interface 上以避免暴露在公網。 兩者都比 SSH 慢,但能應付那 5% 真的需要螢幕的工作。
缺失的那塊:一個總覽所有 agent 的控制台
真正的摩擦點不是「打字進 session」,而是找對那個 session: 哪個 agent 跑完了、哪個在等輸入、哪個一聲不吭很久了。 開 Termius → attach 到 tmux → 跳到正確 session → scroll back — 這一連串大概要 20 秒, 而我一天要付這個稅幾十次。
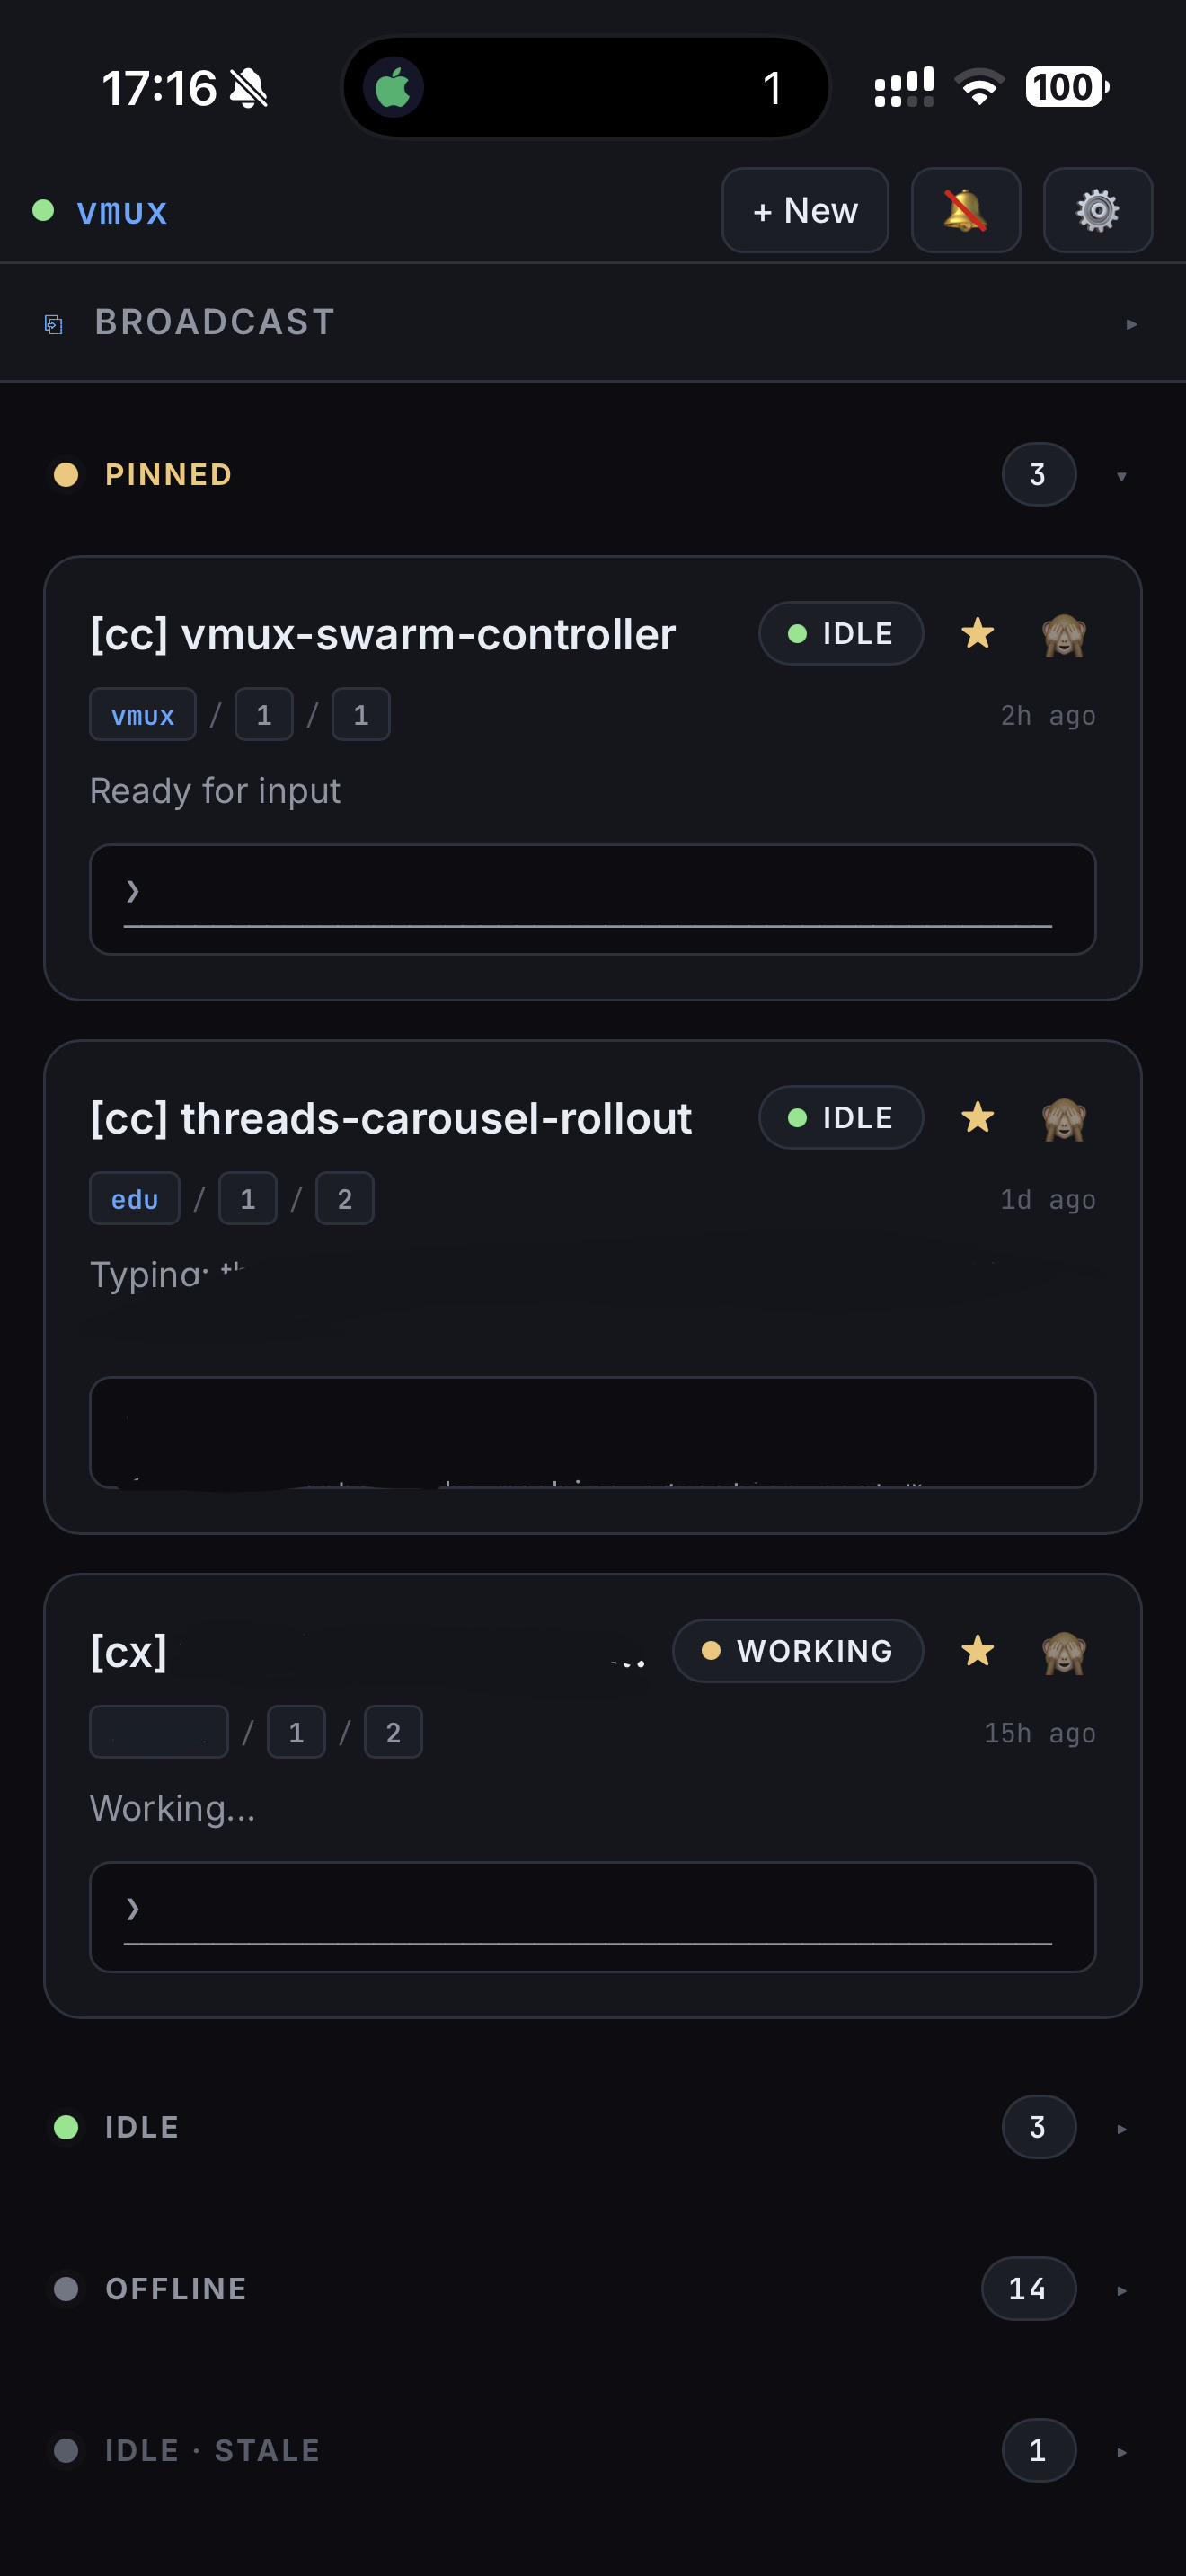
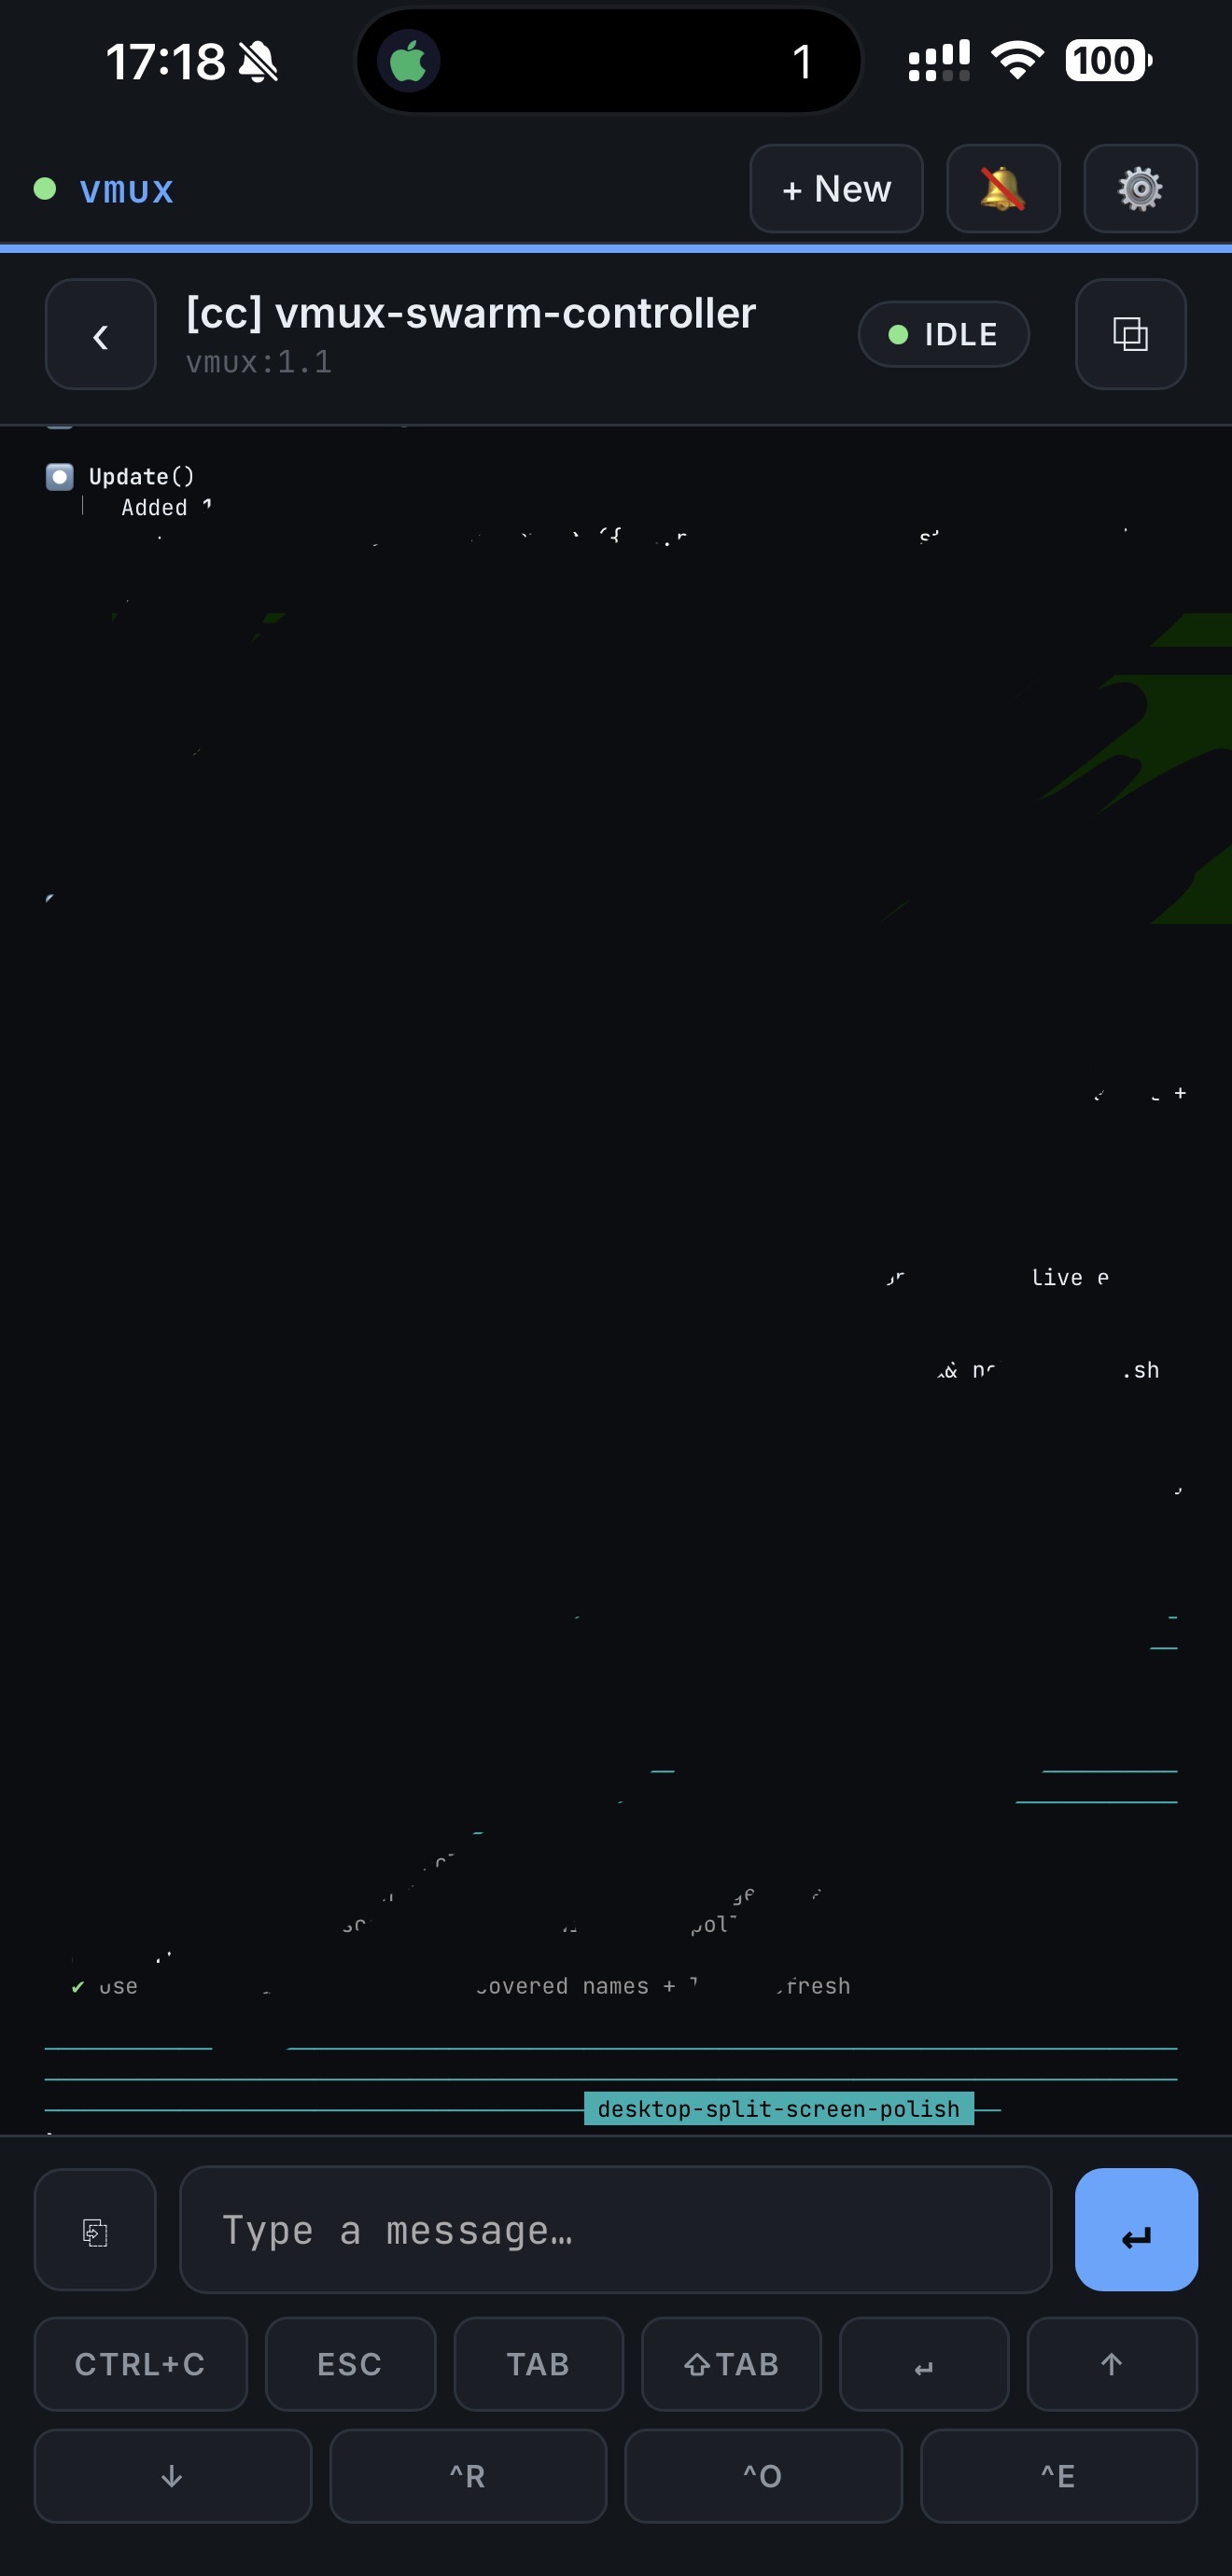
所以我寫了一個小型 PWA,把每個正在跑的 CLI agent 攤成一張卡片,依「最後互動時間」排序。 每張卡片顯示狀態(working、idle、waiting on input)、 專案 tag,以及最新輸出。session 跑完或在等問題時會推播通知。 點卡片會打開一個聊天式介面,可以直接送下一條指令 — 不用 SSH、不用 tmux 切換。
這是我今年對行動工作流最大的改進。我把這個更完整、開源版的計劃叫做 vmux。 目前 repo 只是個 placeholder — 如果星數突破 100,我就會開始把它整理成可發佈的開源專案。 想投票就 star 那個 repo,第一版發佈時 GitHub 會自動通知你。
還想加上的東西
讓 agent 之間不用 copy-paste 就能讀彼此的輸出。 一個 broadcast 模式,可以對選定的一群 session 同時送同一個 prompt(控制台已經為這個保留位置)。 語音輸入 — 在公車上很需要。
核心心得很簡單:把「你」與「agent」之間的每一步都壓短, 同時駕馭十個 agent 就不再像一份工作。
延伸閱讀
如果這篇有任何概念對你來說是新的 — shell 工具、vim、tmux、整套「住在 terminal 裡」的思維 — 我毫不猶豫推薦的一份資源是 MIT 的 Missing Semester(2020 版)。 這是每個 CS 系都該有但都沒有的一門課。另外還有一個 2026 版 我自己還沒看完,但光是 2020 版,一週之內就會回本。
附錄:~/.vimrc
~/.tmux.conf 直接用 gpakosz/.tmux
原樣 — 上游就是正解,貼 1900 行別人 repo 的內容沒意義。個人化覆蓋放進
~/.tmux.conf.local。值得貼出來的是下面這份 .vimrc,自己寫的,刻意精簡。
~/.vimrc
" Comments in Vimscript start with a `"`.

" If you open this file in Vim, it'll be syntax highlighted for you.

" Vim is based on Vi. Setting `nocompatible` switches from the default
" Vi-compatibility mode and enables useful Vim functionality. This
" configuration option turns out not to be necessary for the file named
" '~/.vimrc', because Vim automatically enters nocompatible mode if that file
" is present. But we're including it here just in case this config file is
" loaded some other way (e.g. saved as `foo`, and then Vim started with
" `vim -u foo`).
set nocompatible

" Turn on syntax highlighting.
syntax on
colorscheme delek

" Disable the default Vim startup message.
set shortmess+=I

" Show line numbers.
set number
set nu
set ai
set tabstop=4
set ls=2
set autoindent

" This enables relative line numbering mode. With both number and
" relativenumber enabled, the current line shows the true line number, while
" all other lines (above and below) are numbered relative to the current line.
" This is useful because you can tell, at a glance, what count is needed to
" jump up or down to a particular line, by {count}k to go up or {count}j to go
" down.
set relativenumber

" Always show the status line at the bottom, even if you only have one window open.
set laststatus=2

" The backspace key has slightly unintuitive behavior by default. For example,
" by default, you can't backspace before the insertion point set with 'i'.
" This configuration makes backspace behave more reasonably, in that you can
" backspace over anything.
set backspace=indent,eol,start

" By default, Vim doesn't let you hide a buffer (i.e. have a buffer that isn't
" shown in any window) that has unsaved changes. This is to prevent you from "
" forgetting about unsaved changes and then quitting e.g. via `:qa!`. We find
" hidden buffers helpful enough to disable this protection. See `:help hidden`
" for more information on this.
set hidden

" This setting makes search case-insensitive when all characters in the string
" being searched are lowercase. However, the search becomes case-sensitive if
" it contains any capital letters. This makes searching more convenient.
set ignorecase
set smartcase

" Enable searching as you type, rather than waiting till you press enter.
set incsearch

" Unbind some useless/annoying default key bindings.
nmap Q <Nop> " 'Q' in normal mode enters Ex mode. You almost never want this.

" Disable audible bell because it's annoying.
set noerrorbells visualbell t_vb=

" Enable mouse support. You should avoid relying on this too much, but it can
" sometimes be convenient.
set mouse+=a

" Try to prevent bad habits like using the arrow keys for movement. This is
" not the only possible bad habit. For example, holding down the h/j/k/l keys
" for movement, rather than using more efficient movement commands, is also a
" bad habit. The former is enforceable through a .vimrc, while we don't know
" how to prevent the latter.

" Do this in normal mode...
nnoremap <Left>  :echoe "Use h"<CR>
nnoremap <Right> :echoe "Use l"<CR>
nnoremap <Up>    :echoe "Use k"<CR>
nnoremap <Down>  :echoe "Use j"<CR>
" ...and in insert mode
inoremap <Left>  <ESC>:echoe "Use h"<CR>
inoremap <Right> <ESC>:echoe "Use l"<CR>
inoremap <Up>    <ESC>:echoe "Use k"<CR>
inoremap <Down>  <ESC>:echoe "Use j"<CR>